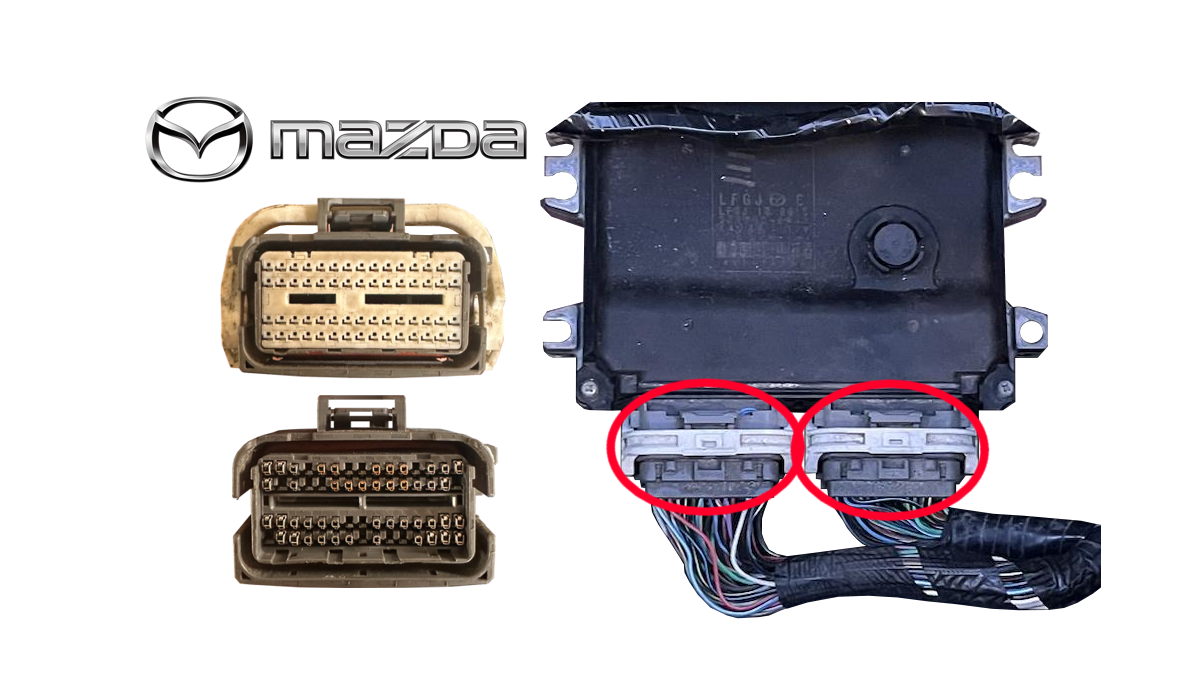
Intro
So if you’ve got a modified NC and you want to remove a lot of factory junk from the wiring harness but want to completely remove it? Well you’re going to need to depin the stock ECU A & B plugs. This real quick article shows and explains how. Hopefully I can save you a lot of time with this.
Cleaning the wire bundle
So to start. You’re going to have to remove all the tape and conduit to expose about twelve inches worth of bare wire from the back of the plug. Then give the wiring bundle a through clean as we’re going to have to pull back the rear part of the plug back down that wire and any dirt or debris will prevent that and could even damage the individual wires during the process if not careful.
Removing the back of the connector
Once you’ve got the wires at the back of the plug back like new (clean). Now we’ll remove the back section of the plug and the locking latch. This is the first main step. If you look at the back section of the plug you’ll see a portion that unclips and slides down the wires. You want to very carefully and gently pry under the four humps or U-shapes at each corner of the back of the plug. Once you’ve unclipped the rear portion of the plug you will have to gently tease the back part using a thin flat blade screwdriver. Take care not to insert the driver too far and puncture the wires. I actually used a Deustch depinning tool (DT-RT1) as I find this tool very handy. You may need another flat-driver or even better a plastic pry tool like the ones from an iFixIt kit. That’s what I used to tease the back cover up enough to slide it down four inches or so.
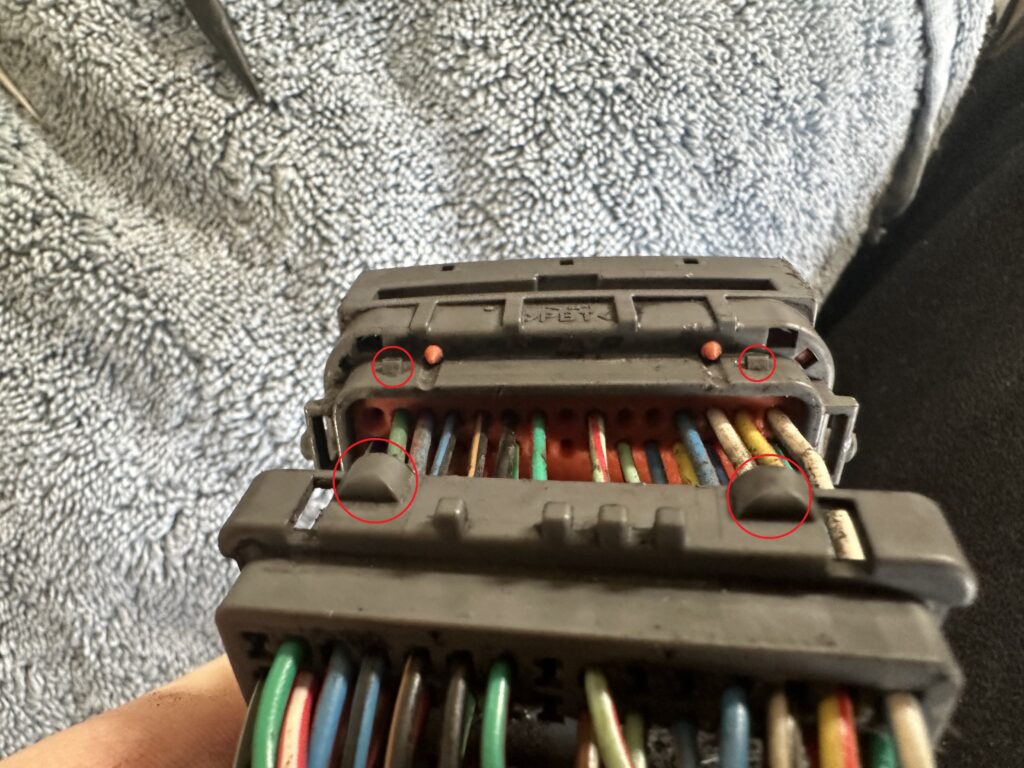
From there you want to fish the wires you’re removing through the back-cover into the new gap between the back connector and the main plug body.
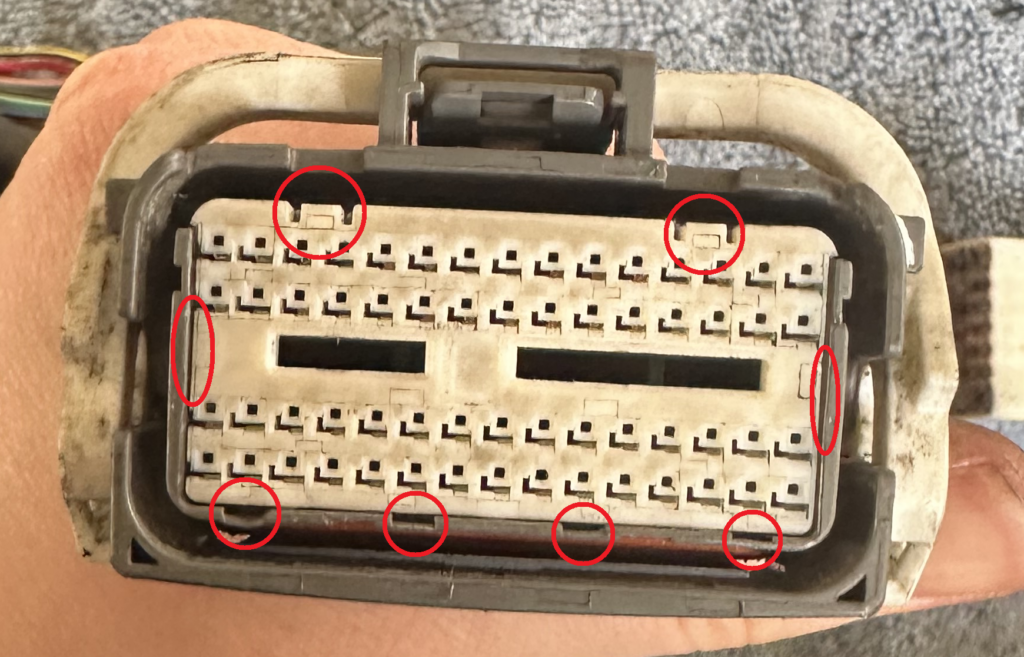
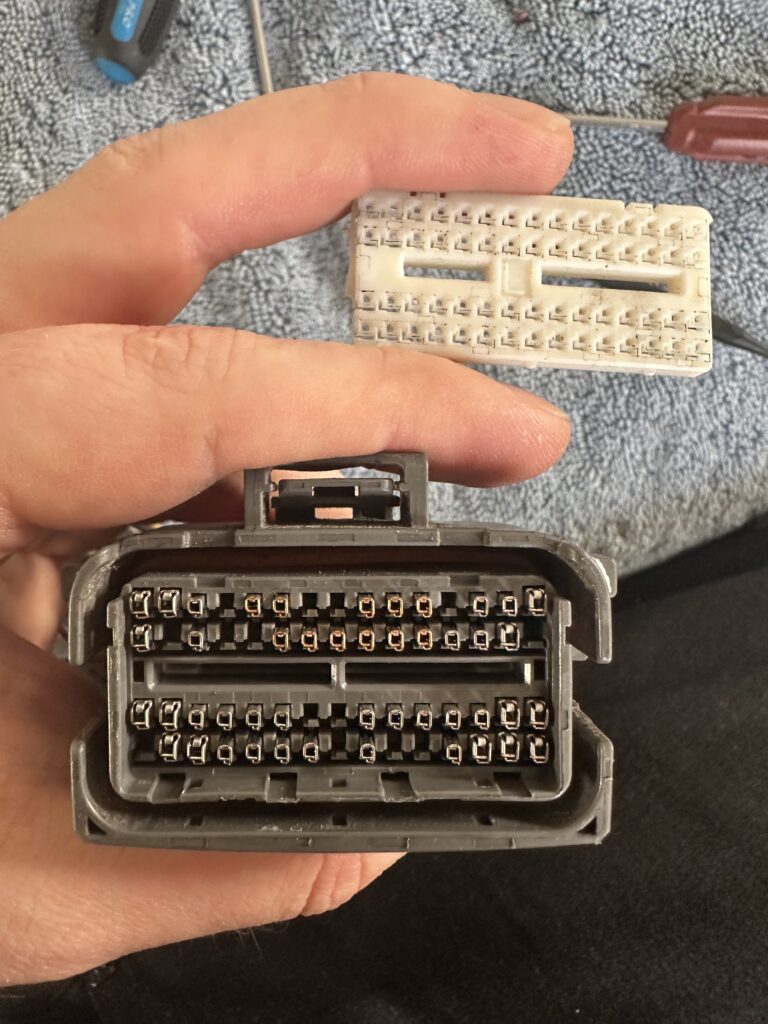
Removing the white end cap
Now we need to remove the white end cap/wedgelock from the main plug. To do this we’re going to need to pry up the four slots marked below first. Then gently work from the bottom side thats already up to the other side and it will click and release and fall out. The Deutsch tool works very well for this so I’d strongly suggest it. Or a flat blade the same size if you’re in a pinch.
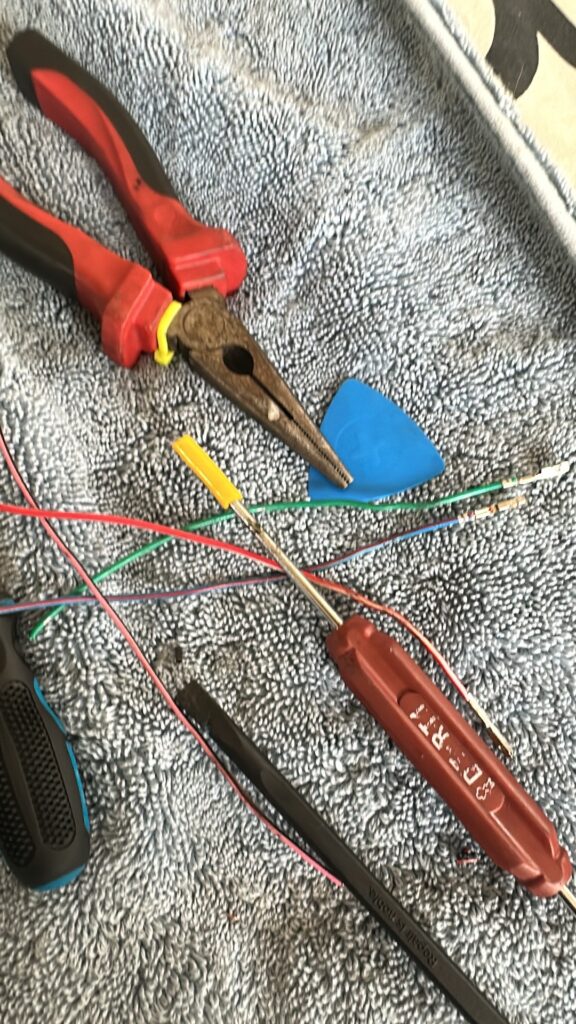
Extracting pins
Now we’re ready to carefully remove the unwanted pins from the connector/plug housing. If you look at the connector face on. You’ll see there’s a release tab below each pin. With a sharp straight pick. Pry the tab backwards or down and get the pick deep enough to lever the pin up. Be delicate here. You want to extract the pin without compromising it. DO NOT grab need-nose pliers and yank each pin out. YOU WILL FAIL. The pins will break off and you’ll be in a world of pain. Instead carefully lever the pin up and take your time. It’s faster this way believe me.

Repeat this process for all your unwanted pins.
Putting the plug back together
The hard part begins. I personally found it easier now to slide the backside of the connector down the wires and click it back onto the main connector body. Check its on properly then proceed to the next step.
Okay now you need to use your nail and carefully push down all the pins till they are seated down all the way. This takes no effort. DO NOT force them down. Just a gentle push and you’ll feel them bottom out. Make sure all the release tabs are pushed back up straight locking all your pins in. If they are bent back a little from lever the pins up then using a pick push them back up straight.
Reinstalling the white cap
From here the hardest part is reinstalling the white end-cap/wedge lock piece. During disassembly you may have broken an ear off like circled below. If you break one off it’s not the end of the world. The latch will still pop back in because it is extremely tight anyways.
The best way to get the white end-cap/wedge-lock back in I found was to start it at one end and using the Deutsch depinning tool I levered it down into position. On each of the shortest length ends there is a small long lip that will seat into the connector-body. Study the connector in-real-life to see what I mean. If you do not get this piece to sit down flush so there’s no gap between the end of the black-connector-body and the start of the white end-cap/wedge-lock then pry it back up and try again. This step is hard to describe due to the nature of the task. But take your time and you will eventually get it to pop back in. Make sure if you have any of the two ears/hooks left they are latched over the main-connector-body. Once this is done that’s it. Check the white piece is installed properly. If you’re happy reinstall the connector latch by stretching it over the two black pins on either side of the main-connector-body.
Important last step
Lastly it is important to pack the back of the connector where the individual wires pass through with die-electric grease. Back it like a bearing. Ensure all openings on the back of the connector, especially the pins you removed get packed with die-electric grease to stop water ingress and potential future corrosion damage.
Job done. Hopefully this saved you time with this potentially daunting connector for the less experienced doing automotive wiring on their NC.
Leave a Reply